Ellen has been collecting special stones for many years now, so she had quite a few to choose from.
She had planned to find one on an upcoming trip, but when that trip became impossible because of some health concerns, she decided to find one from her collection.
She called one day, excited to tell me about the stone she had found. She said she calls it her "Mt. Hood Doorstop" because it is shaped like a mountain, with a point on the top. She had certain colors she wanted, to match her decor...white, and gray, and mauve. She was afraid the sharp edge on the rock might be a problem, and we discussed the possibility of covering the point at the top with crochet, so it wouldn't be too sharp. There were also some sharp edges on the side and bottom of the piece, as well.
As we brainstormed the doorstop design, I began to get an image in my mind of what this creation could look like. We both began to get excited as we imagined our creation! I suggested that I could do the white top at the peak resembling snow, and then do some of the gray in an openwork pattern so the rock could show through. I asked her if she would mind if I used some forest green along the lower flanks of the mountain, and she suggested that maybe I could use the mauve to represent flowers sprinkled through the forest. Later she called me back and asked if I could make some white parts that would flow down like glaciers...I had already planned to do that.
I was very excited when her husband dropped by soon after with the rock and some color swatches.
 |
| The front face of the rock |
 |
| The back face of the rock |
 |
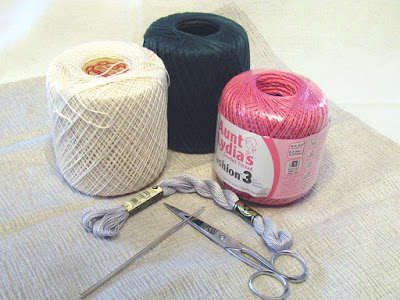
| The tools and materials for the doorstop |
I had asked my husband if we had anything that could smooth the sharp edges on the stone, and he said no. He suggested emery cloth, but I didn't know where I could get some. One day, as I was running my finger along the rough edges of the stone, I got an idea. Would an emery board work? I had a few around, and tried one. It smoothed the sharp edges of the stone into a fine dust, without marring the flat surfaces of the rock. Praise the Lord! Problem solved.
I was now able to begin crocheting the cover for the rock. My plan was simple (or so I thought). I would make the "snowy top" first, then do most of the lacy gray openwork part, then crochet the bottom green and mauve part, and last I would use the gray to connect the top and bottom parts.
I began with the white, making a relatively amorphous cone for the top of the mountain. I wanted some "glaciers" that would come farther down the mountain than others.
 |
| The "snow" for the top of the mountain |
Next, I worked on the openwork with the gray thread.
At first, I just worked a network around the white edges, but I didn't like the corners that this formed in the white thread. I ripped it out, and worked a round of sc in gray around all the white edges, then worked the network again. This looked much better.
Now, I was ready to work the most difficult part of the doorstop...the green bottom part. This was difficult because the rock was such a complex shape. I decided to work a flat piece for the bottom that would more or less match the shape of the bottom of the rock.
 |
| Comparing the flat bottom to the bottom of the rock |
It was a bit loose...especially at the top, where the rock was rapidly decreasing in size.
I tried the top on, too...just to get an idea of how they would fit together. I decided I would need to decrease several times on the edge where the stitch marker is, to make it fit better. I ended up ripping back the gray part, and redoing parts of it, before working the joining round.
Here is the finished product. I wish the green part was a little less wonky, but overall I am pleased with the results. I might just have to look for more mountain-shaped rocks! I think Miss Ellen will love it.
The back side of the mountain is not quite so neat and tidy, because of its uneven shape.
 |
| Side view |
 |
| Opposite side view |
Looking at the side views shows how wonky the shape really was...this is what made it complicated to fit the crochet to the rock.
Here are a couple more photos of the mountain, because I had so much fun taking them!

When my daughter saw the photos I had taken, she suggested that I do some with blue sky as the background, so it would really look like a mountain. So here are a couple shots.
P.S. This doorstop is a Christmas present for Miss Ellen...let's keep the photos to ourselves until Christmas!


