Friday, December 14, 2018

Ornaments of Christmas Past


As she was unpacking some of our Christmas decorations this year, my daughter was asking about some of the handmade ornaments in our collection.  In the early years of our marriage, we didn’t have a lot of ornaments for our tree, and I decided to make some crocheted and knitted ones.
I made some of them from a Leisure Arts flyer, and maybe some from an article in McCall’s Needlework & Crafts magazine.  But then I started making some little motifs from crochet pattern books that looked festive to me.  My sister-in-law gave me a pattern for some knitted bells that I liked on her tree, and I made a bunch of those as well.  I liked the fact that I could put little jingle bells in them to make them ring. 

An assortment of handmade Christmas ornaments


I think my hands-down favorite of the ornaments I made early in our marriage was one that I designed myself.  Using the idea of the knitted bells with the little jingle bells inside, I designed a crocheted Christmas bell pattern using some metallic yarn that was popular at the time.  As a special Christmas gift to my readers, and crocheters everywhere, I have written up the pattern for this crocheted Christmas bell, and it will be available for free on Ravelry and Craftsy.  Here are the links to the pattern download:
Ravelry:  https://www.ravelry.com/patterns/library/christmas-bell-ornament-6  Craftsy:  https://www.craftsy.com/crocheting/patterns/christmas-bell-ornament/667346    Enjoy!!  

Worsted Weight Bell
Sport Weight Bell from Vanna's Glamour
Thread Bell

This pattern can be made in several sizes, depending on what size of yarn you choose to use.  The worsted weight bell measures 3” tall by 3 ½” in diameter at widest point, the sport weight bell measures 1 ¼” by 2 ½”, and the thread bell measures 1 ½” by 1 ½”.  So choose your yarn weight and desired size!

Three sizes of bells


Several of these little bells would make a great wreath decoration, or use them on a garland.  They look great in a metallic yarn, as I originally used.  Use your imagination, and have fun with them.

Christmas Bell made with metallic yarn

Friday, December 7, 2018

Stitch Swatch Sampler Swatch 9: Slip Stitch Rib


SWATCH 9:  SLIP STITCH RIB


This is an amazing stitch pattern.  It forms a fabric that, when turned  90 degrees, resembles a knitted ribbing, both in appearance and resilient stretchiness.  

Slip Stitch Rib Swatch, turned 90 degrees
Once you practice a bit, I think you will love it!  It is much more rib-like than single crochet in the back loop.  If you choose to use this as a rib at the edge of a sweater or cap, you will need to crochet it from side to side of the garment…that’s just the way this stitch works.

The stretch of this rib
Ch 17 (multiple of 1, +2 turning chains)
Row 1:  Sl st in 3rd ch from hook and in each ch across row.  15 sts.  Turn work.
Row 2:  Ch 1, sl st in BL of each st across row.  Turn work.

Rep Row 2 until your piece measures 4 inches.  Break off and weave in ends.

Abbreviations:  Ch  chain  sl st  slip stitch  st  stitch  BL  back loop  Rep  repeat


To work a sl st, insert the hook into the next st, yo hook, and draw through the st, then immediately through the loop on the hook.


Slip Stitch Rib Pro Tips:
  •  Turn the right edge of the work to the back, then to the left at the end of each row.  It might seem more natural to turn the work as if the fabric were the page of a book, but I find turning it this way creates a nicer edge.  Try it both ways, and see which you prefer.
  •  Instead of inserting the hook into the back loop of the last stitch, insert it under the front loop and the diagonal loop at the edge of the work (see photos).
  •  Be sure to not work your slip stitches too tightly.  Aim for a consistent, even tension.

  • Insert hook under the strand marked in red, then under the strand marked in blue
    Hook inserted under horizontal strand
    
Hook inserted under diagonal strand at edge.  Note that the hook tip comes out to the side, rather than to the back of the work.

Saturday, November 24, 2018

Stitch Swatch Sampler Swatch 8: Checkerboard Stitch

SWATCH 8:  CHECKERBOARD STITCH

Checkerboard Stitch
Ch 14 (multiple of 4, plus 2 turning chains)

Row 1:  Sc in 3rd ch from hook and in each st across.  12 sts.  Turn.
Row 2:  Ch 1, sc in first 2 sts, dc in next 2 sts.  *Sc in next 2 sts, dc in next 2 sts.  Rep from * across row.

Rep Row 2 nine times more, until you have 10 rows total. 

Last row:  Ch 1, sc in each st across row.  Break off.

Checkerboard Stitch Pro Tips:
  • ·         As for single crochet, work the last stitch into the turning chain instead of the last stitch; this will give a more straight, even edge.  In general, use single crochet pro tips.
  • ·         Note that normally you will be working a sc into a dc or a dc into a sc when working this stitch pattern.
  • ·         If you have trouble getting the correct gauge on this stitch pattern, use whatever hook size will give you the stitch gauge (12 sts=4”).  Adjust the row gauge by working more or less rows (making sure your first and last rows are in plain sc).  If it helps, you could work two sc rows at each end instead of one…whatever works.


Stitch Swatch Sampler Swatch 7: Up and Down Stitch

SWATCH 7:  UP AND DOWN STITCH

Up and Down Stitch

Ch 14 (Multiple of 2, + 2 turning chs)
Row 1:  Sc in 3rd ch and in each st across.  Turn.  12 sts.
Row 2:  Ch 1, sc in first st, (dc in next st, sc in next st) 5 times, sc in last st.  Turn.

Rep Row 2 until you have 11 rows, then rep Row 1.  Break off.

Abbreviations:  ch  chain  sc  single crochet  st  stitch  dc  double crochet  rep  repeat

Up and Down Pro Tips:
  • ·         As for single crochet, work the last stitch into the turning chain instead of the last stitch; this will give a more straight, even edge.  In general, use single crochet pro tips.
  • ·         Note that normally you will be working a sc into a dc or a dc into a sc when working this stitch pattern.
  • ·         It may help to chant, “Single, double” over and over again as you do this stitch pattern.  If there are people around, you have my permission to just think it.
  • ·         If you have trouble getting the correct gauge on this stitch pattern, use whatever hook size will give you the stitch gauge (12 sts=4”).  Adjust the row gauge by working more or less rows (making sure your first and last rows are in plain sc).  If it helps, you could work two sc rows at each end instead of one…whatever works.


Saturday, October 27, 2018

Stitch Swatch Sampler Swatch 6: Double Crochet

SWATCH 6:  DOUBLE CROCHET

Double Crochet Swatch


(Note:  I had to use a size H hook to get the correct gauge on this square.)
Ch 15 (Multiple of 1 + 2 turning chains)

Row 1:  Dc in 4th ch from hook (counts as a st) and in each ch across.  Turn.  13 sts. 
Row 2:  Ch 3 (see Double Crochet Pro Tips), dc in next st and in each st across.  Turn.

Rep Row 2 until you have a total of 7 rows, or until swatch measures 4 inches high.

Abbreviations:           Ch  chain       dc   double crochet        st    stitch      Rep   repeat

Double Crochet Pro Tips:
  • ·         I find that two turning chains work better for me at the beginning of a dc row than 3.  It makes a straighter, smoother edge for me.  Try it and see if it works better for you!

  •       As for single crochet, I prefer the look of the edge if I turn the work so the right edge goes to the back, rather than turning the work like the page of a book.  Again, see which you like best.

  • ·         If you want each double crochet to be perfectly aligned with the dc below it, try this.  Insert your hook under 3 strands at the top of the dc, not just under the top 2.  Look at the dc you are working into.  Below the top two strands, there is a more or less horizontal strand at the front of the work.  It forms a sort of sideways “V” (opening to the left) with the front strand at the top of the stitch.  

Insert hook under top 2 strands and strand marked with red dot


Completed dc 
Dc stitches lined up neatly
       If you insert your hook under all 3 of these strands, when you draw the loop through the stitch, your stitch will rise up out of the center of the stitch below it, not slightly to the side of it.  This works well for techniques like Filet Crochet, where you want the stitches to line up accurately.  Note that if you are working in the round, the opposite side of the stitch will be facing you, so that horizontal strand will lie at the back.  If you are working into the back loop of a round of dc, you can insert your hook into the back 2 loops only and create a more solid join at the base of your stitch.

Can you see a difference between my original swatch (left) and the one made using my Double Crochet Pro Tips?

Excerpted from Crochet Basics by Rebecca Harmon


Double Crochet

Make a chain.  Rotate the hook counter-clockwise so that the yarn wraps around the shaft once.  Insert the hook into the fourth chain from the hook (see Fig. DC-1), catch the yarn on the hook and pull through the chain stitch.  There are now 3 loops on the hook.  Wind the yarn over the hook again (this is called yarn over and is abbreviated yo), and pull through 2 loops.  Yo hook again, and pull through the last 2 loops on the hook.  You have just completed one double crochet stitch.
Fig. DC-1
For the next double crochet stitch (dc), yo hook, insert the hook in the next chain to the left, yo and pull through the chain, yo, pull through 2 loops, yo, pull through 2 loops.  Continue in this manner across the row, working one dc into each chain stitch. 


Row 2:  At end of row 1, chain 3; turn work as you would the page of a book.  Yo hook, insert hook under top 2 strands of next stitch, yo hook, pull through stitch, yo hook, pull through 2 loops, yo hook, pull through 2 loops.  Work a dc in each stitch cross row.

Note:  Unless directed otherwise in a specific pattern, insert the hook under both loops of each stitch.

Monday, October 22, 2018

Stitch Swatch Sampler Swatches 4 and 5: Single Crochet in Back and Front Loop


I didn't get last week's swatch post up, so I decided to include it with this week's post.  The two stitches are related...each involves inserting the hook into only one strand of the stitch of the previous row.  If you haven't done this before, start your swatch; after the first row, look at the tops of the stitches of the row you have just completed.  At the top of each stitch are two strands that look like a sideways "V".  When crocheting into the back loop, always insert your hook under the back strand, the one farthest from you, and when crocheting into the front loop, insert it under the front strand, the one closest to you.  Do this the same way on every row to work these patterns.

SWATCH 4:  SINGLE CROCHET IN BACK LOOP


This stitch creates a ridged effect, somewhat like knitted rib.  It is often used for ribbed edgings on sweaters.  Usually it is crocheted from side to side of the garment, so the ribs are oriented vertically.

Ch 15 (Multiple of 1 + 2 turning chains)
Row 1:  Sc in 3rd ch from hook and in next 12 chs.  13 sts.  Turn work.
Row 2:  Ch 1; sc in BL of each st across.  Turn work.
Rep Row 2  13 times more, until you have 15 rows total.

Abbreviations:  Ch(s)  Chain(s)     sc  single crochet    BL  back loop     st  stitch     Rep  repeat

See Single Crochet Pro Tips in Single Crochet Swatch instructions.

SWATCH 5:  SINGLE CROCHET IN FRONT LOOP


This stitch surprised me!  I had assumed that crocheting in the front loop on every row would create the exact same effect as crocheting in the back loop, but I was wrong…the fabric is totally different.  Single crochet in the back loop creates a very textured ridged fabric…a kind of corrugated effect.  Single crochet in the front loop creates a smooth, flat fabric with horizontal lines.  Quite a pretty look, but not at all what I was expecting!

Ch 15 (Multiple of 1 + 2 turning chains)
Row 1:  Sc in 3rd ch from hook and in next 12 chs.  13 sts.  Turn work.
Row 2:  Ch 1; sc in FL of each st across.  Turn work.
Rep Row 2  10 times more, until you have 12 rows total.

See Single Crochet Pro Tips in Single Crochet Swatch instructions.


Saturday, October 13, 2018

Stitch Swatch Sampler Swatch 3: Woven Stitch


SWATCH 3:  WOVEN STITCH  

(Adapted from the Reader’s Digest Complete Guide to Needlework, p. 373)


Swatch 3:  Woven Stitch


Ch 15.  (Multiple of 2 +1 , plus 2 turning chains)*
Row 1:  Sc in 3rd  ch from hook  and in each ch across row.  Turn work.  13 sts.
Row 2:  Ch 1; sc in first st, (ch 1, sk 1 st, sc in next st) 6 times.  Turn work.
Rep Row 2  12 more times, for a total of 14 rows.

Abbreviations:  Ch  Chain     sc  single crochet    sk  skip     st  stitch     Rep  repeat
See Single Crochet Pro Tips.
*To use a different number of stitches, start with a multiple of 2, and add 3 to it.

Here is a chart for Woven Stitch.  Please excuse the rather crude rendition…I am playing around with new charting software.

Chart for Woven Stitch


A Note About Gauge


Stitch Swatch Sampler Project:  Changing the Number of Stitches

If you decide to alter the number of stitches in your swatch, here is how to do it.  I will try to put the information you will need in the instructions for each swatch, after the number of starting chains.  For example, (Multiple of 2+1, +2 turning chains).  To alter the number of starting chains, choose a number that is a multiple of the number stated (in this case, a multiple of 2).  So if your swatch was too big, you will need to chain less than the number stated in the instructions.  To this number you will add however many additional chains specified to work the pattern, (in this case, 1), plus the number of chains you will need to chain up for your first stitch (in this case, 2).  Here’s why.

Let’s look at the instructions for Alternate Stitch.  It says to chain 15.  If you look at instructions for the second row (where the stitch pattern really starts), you will be skipping the first stitch, then working two stitches in the next, and will repeat this pattern across the row.  Here is how it looks, graphed out:


The row of starting chains are represented by the 14 ovals on the bottom and the one oval at the right side.  The first row is represented by the plus signs, which each denote a sc stitch.  The first row is read from right to left, the second row (which begins with a chain stitch) is read from left to right.  On the second row, you will repeat the highlighted section (sk 1 st, 2 sc in next st) until you get to the last st.  So you have a repeat of 2 stitches across the row, with one more sc in that last stitch.  In order to maintain the same number of stitches in each row, you need to use the same number of stitches each time, which is a multiple of 2, plus that last one.  Technically, you could probably work this pattern stitch with an even number of stitches, but I suspect that the last single stitch in the row helps to maintain a more even, straight edge.  When beginning your work, you need to account for the extra stitches needed to chain up to the height of your row, so in addition to the number of stitches you want in each row, you need to add additional ones (the last number, which is the number of turning chains needed to make the “corner” of your work nice and neat). 

So, if you want less stitches in your rows to create a narrower fabric, you will need to chain less than 15.  I would try 2 less, so chain 13.  That would remove one repeat from your pattern.  You would end up with 11 stitches on your first row, instead of 13.

Friday, October 5, 2018

Stitch Swatch Sampler: Swatch 2, Alternate Stitch


SWATCH 2:  ALTERNATE STITCH

(Adapted from the Reader’s Digest Complete Guide to Needlework, p. 372)
This stitch uses only chain, and single crochet stitches, so is a good one to reinforce stitches you have already learned.  It involves working 2 stitches into one and then skipping a stitch, which creates the pretty texture.  I have added a row of plain single crochet to the top and bottom edges to keep them straight.  


Ch 15.  (Multiple of 2+1, +2 turning chains)*
Row 1:  Sc in 3rd ch from hook; sc in each remaining ch across row.   Turn work.   13 sc.
Row 2:  Ch 1, (sk 1 st, 2 sc in next st) 6 times, sc in turning ch.  Turn work.
Rep Row 2  11 times more, for a total of 13 rows.

Abbreviations:  Ch  Chain     sc  single crochet    sk  skip     st  stitch     Rep  repeat

See Single Crochet Pro Tips.
*To use a different number of stitches, start with a multiple of 2, and add 3 to it.

Monday, October 1, 2018

Stitch Swatch Sampler: General Information and Swatch 1 Instructions

I am very excited about our new Stitch Swatch Sampler project!  I have been busily crocheting swatches and writing out instructions.  It is my hope that this project will build crochet skills, not only in beginner crocheters, but in intermediate and advanced ones, as well.  I intend to include some "Pro Tips" in the instructions that even advanced crocheters may find interesting.

A friend was asking if I thought she could use the swatches to teach her grandchildren to crochet.  I think this would work well for teaching someone who has never crocheted before.  To that end, I will try to include instructions for the basic stitches from a booklet I wrote years ago, entitled Crochet Basics.

  I would recommend spending additional time on the first swatch that utilizes each of the basic stitches (sc, dc, hdc, tr) to make sure the beginner can work them evenly and achieve gauge, before moving on to the more advanced swatches.  It would probably be a good idea to make several swatches of each basic stitch, to become comfortable with working that stitch.

Here is the information you need to do this project.

GENERAL PROJECT INFORMATION


**Please note that we will be using American terminology and American hook sizes for this project!

Materials:  Worsted Weight Yarn, Size 4,  6 oz. for a 12 by 12-inch pillow
30 oz. for size 3 ft by 4 ft throw
50 oz. for size 4 ft by 5 ft throw
Size I hook (but you may need to use a larger or smaller hook to achieve gauge for some                     of the swatches)

I have had such fun playing around with stitch patterns for the swatches, and I have been learning new things, too.  The "Pro Tips" for the Single Crochet Swatch are things I have discovered recently...I hope you will find them useful.  So now, without further ado, here are the instructions for the first swatch!

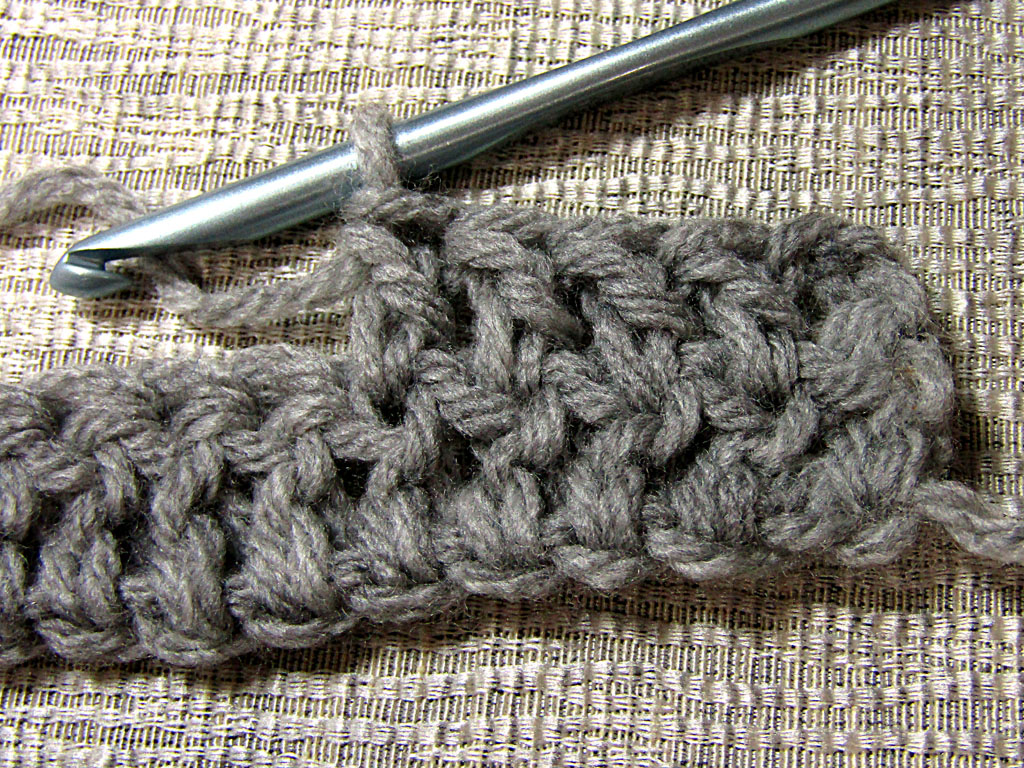
SWATCH 1:  SINGLE CROCHET

Single Crochet Swatch


See information below on how to do the chain and the single crochet stitch, if you are new to crochet.

Ch 14.  (Multiple of 1 + 2 turning chains)
Row 1:  Sc in 3rd ch from hook and in each ch across.  Turn work.  12 sts.
Row 2:  Ch 1, sc in each st across.  Turn work.  Rep Row 2 until you have 15 rows or 4 inches.

Abbreviations:  Ch  Chain     sc  single crochet     st  stitch     Rep  repeat

Single Crochet Pro Tips:
  • ·         Always use a starting chain that is 2 stitches more than the number of stitches you need for your project, and work your first sc into the 3rd stitch from the hook, for the neatest corner.  This is different than the way I was taught, and the way I describe in Crochet Basics, but it works better.
  • ·         When you reach the last stitch of the row, instead of working into this stitch, work into the starting chain of the previous row, for a nice, straight edge.
  • ·         When turning your work at the end of a row, try turning the piece to the back, then to the left, rather than forward as if you were turning the page in a book…I have found that this produces a nicer edge (note that the instructions below say differently...I have learned some new tricks since I wrote those instructions!).
Note:  Be sure to check your gauge when you complete this piece.  It should measure 4 inches by  4 inches.  If your piece is bigger, try using a smaller hook.  If it is smaller, switch to a larger one.  Gauge is very important in crochet…it will help you make the finished product the size you want it to be.  I have designed each square to be 4 inches, but only if you get the same gauge I do, and that may not happen on your first try.

If you cannot get the same gauge by using a different hook, you could try working a little tighter or looser.  Or you could alter the number of stitches and rows in your square.  This gets more complicated with taller or more intricate stitch patterns, but it may be possible.  I will try to post the stitch multiples for each stitch, to make it easier to figure out how many starting chains you need.  For sc, you can chain any number to start, plus two turning chains.

Feel free to make as many of each swatch as you want!  If you want to stop with single crochet, you could make all the squares for your blanket using just that one stitch.  But I really hope you will be inspired to try more of the stitches, and develop your skills while having fun with us.

The first dozen or so of these stitches were adapted from the Reader’s Digest Complete Guide to Needlework, which has a section of stitch patterns.  But we will be drawing from other sources, too.


Excerpted from Crochet Basics by Rebecca Harmon
Crochet is a method of making fabric from yarn, which is made into a series of interlocking loops using a hook.  Here are the most common crochet stitches. 

Chain 


With the tail of the yarn hanging down from the little finger, wrap the yarn around the fingers of the left hand as shown in Fig. C-1.
Fig. C-1


Pick up the crochet hook and hold it as you would a pencil.  Insert the hook through the loop on your thumb with the point of the hook pointing towards the tip of the thumb.  See Fig. C-2.
Fig. C-2

 Rotate the tip of the hook counter-clockwise so the yarn between the thumb and the index finger is caught on the hook (see Fig. C-3).

Fig. C-3

 Carefully pull the tip of the hook back through the thumb loop; slip the thumb from the loop and pull the ends of the yarn until the loop is snugged up just under the hook.  Do not pull the loop too tight, because you will need to insert the hook into it later.  You have just made the first stitch of your chain.


Now, holding the first stitch between the thumb and middle finger of your left hand, catch the yarn on the hook again (Fig. C-4), and draw through the loop on the hook (the old loop will slide off the hook and the new loop will be in its place).
Fig. C-4


Continue catching the yarn and drawing it through the loop on the hook until the chain is the desired length. 

Single Crochet

Now we are ready to start forming the fabric.  We will begin with the single crochet stitch (abbreviated sc).  Pull the chain out so that it stretches away to the left of the loop on the hook.  Insert the tip of the hook into the 2nd chain from the hook (see Fig. SC-1).
Fig. SC-1
 Catch the yarn on the hook, and draw through the chain stitch; there are now 2 loops on the hook (Fig. SC-2).

Fig. SC-2
Catch the yarn again, and draw through both loops on the hook (one single crochet stitch completed).  Insert the hook into the next chain stitch to the left, catch the yarn, draw through the chain, catch the yarn again, and draw through both loops on the hook.  Continue working a single crochet (sc) into each chain across.

Second Row:

Make 1 chain stitch at end of Row 1, then turn the piece of crochet as if it were a page in a book.  Insert the hook under the top two loops of the first single crochet stitch (the one at the right end of your work).  Catch the yarn and draw through the stitch; catch the yarn again and draw through both loops on the hook.  Continue to work one single crochet into the top two loops of each stitch across the row.  The rest of the rows should be worked in the same manner as Row 2.

At the end of the last row of single crochet, cut the yarn about 8 inches from the last stitch.  Pull the hook up so the tail end pops through the top of the last stitch, and pull snugly to secure it and keep your work from unraveling.  This is called ending off or breaking off, and can be done with any stitch.  

Saturday, September 29, 2018

Stitch Swatch Sampler Project: Textured Crochet Stitches


My daughter Gwennie just graduated from college, and now that she has a little more time on her hands, she wants to refresh her knitting and crochet skills.  We came up with this project to help her build her skills, and we would like to invite you to join along as we explore textured crochet stitches.  

I will be posting the instructions for each swatch on my blog, and Gwennie will be making the swatch and posting a photo on Instagram.

This is an opportunity to build your crochet skills, whether you are a relative beginner to crochet or an intermediate crocheter…and even advanced crocheters may learn a few new tricks as we progress from our first block (single crochet) to more advanced textural techniques (clusters, balls, puffs, popcorns, post stitches, and so on).  The idea is to make a 4-inch square block for each stitch, and later join them together to make a useful project.  So find some yarn, pick up your hook, and let’s get started!!
A pile of swatch ideas!