Monday, October 1, 2018

Stitch Swatch Sampler: General Information and Swatch 1 Instructions

I am very excited about our new Stitch Swatch Sampler project!  I have been busily crocheting swatches and writing out instructions.  It is my hope that this project will build crochet skills, not only in beginner crocheters, but in intermediate and advanced ones, as well.  I intend to include some "Pro Tips" in the instructions that even advanced crocheters may find interesting.

A friend was asking if I thought she could use the swatches to teach her grandchildren to crochet.  I think this would work well for teaching someone who has never crocheted before.  To that end, I will try to include instructions for the basic stitches from a booklet I wrote years ago, entitled Crochet Basics.

  I would recommend spending additional time on the first swatch that utilizes each of the basic stitches (sc, dc, hdc, tr) to make sure the beginner can work them evenly and achieve gauge, before moving on to the more advanced swatches.  It would probably be a good idea to make several swatches of each basic stitch, to become comfortable with working that stitch.

Here is the information you need to do this project.

GENERAL PROJECT INFORMATION


**Please note that we will be using American terminology and American hook sizes for this project!

Materials:  Worsted Weight Yarn, Size 4,  6 oz. for a 12 by 12-inch pillow
30 oz. for size 3 ft by 4 ft throw
50 oz. for size 4 ft by 5 ft throw
Size I hook (but you may need to use a larger or smaller hook to achieve gauge for some                     of the swatches)

I have had such fun playing around with stitch patterns for the swatches, and I have been learning new things, too.  The "Pro Tips" for the Single Crochet Swatch are things I have discovered recently...I hope you will find them useful.  So now, without further ado, here are the instructions for the first swatch!

SWATCH 1:  SINGLE CROCHET

Single Crochet Swatch


See information below on how to do the chain and the single crochet stitch, if you are new to crochet.

Ch 14.  (Multiple of 1 + 2 turning chains)
Row 1:  Sc in 3rd ch from hook and in each ch across.  Turn work.  12 sts.
Row 2:  Ch 1, sc in each st across.  Turn work.  Rep Row 2 until you have 15 rows or 4 inches.

Abbreviations:  Ch  Chain     sc  single crochet     st  stitch     Rep  repeat

Single Crochet Pro Tips:
  • ·         Always use a starting chain that is 2 stitches more than the number of stitches you need for your project, and work your first sc into the 3rd stitch from the hook, for the neatest corner.  This is different than the way I was taught, and the way I describe in Crochet Basics, but it works better.
  • ·         When you reach the last stitch of the row, instead of working into this stitch, work into the starting chain of the previous row, for a nice, straight edge.
  • ·         When turning your work at the end of a row, try turning the piece to the back, then to the left, rather than forward as if you were turning the page in a book…I have found that this produces a nicer edge (note that the instructions below say differently...I have learned some new tricks since I wrote those instructions!).
Note:  Be sure to check your gauge when you complete this piece.  It should measure 4 inches by  4 inches.  If your piece is bigger, try using a smaller hook.  If it is smaller, switch to a larger one.  Gauge is very important in crochet…it will help you make the finished product the size you want it to be.  I have designed each square to be 4 inches, but only if you get the same gauge I do, and that may not happen on your first try.

If you cannot get the same gauge by using a different hook, you could try working a little tighter or looser.  Or you could alter the number of stitches and rows in your square.  This gets more complicated with taller or more intricate stitch patterns, but it may be possible.  I will try to post the stitch multiples for each stitch, to make it easier to figure out how many starting chains you need.  For sc, you can chain any number to start, plus two turning chains.

Feel free to make as many of each swatch as you want!  If you want to stop with single crochet, you could make all the squares for your blanket using just that one stitch.  But I really hope you will be inspired to try more of the stitches, and develop your skills while having fun with us.

The first dozen or so of these stitches were adapted from the Reader’s Digest Complete Guide to Needlework, which has a section of stitch patterns.  But we will be drawing from other sources, too.


Excerpted from Crochet Basics by Rebecca Harmon
Crochet is a method of making fabric from yarn, which is made into a series of interlocking loops using a hook.  Here are the most common crochet stitches. 

Chain 


With the tail of the yarn hanging down from the little finger, wrap the yarn around the fingers of the left hand as shown in Fig. C-1.
Fig. C-1


Pick up the crochet hook and hold it as you would a pencil.  Insert the hook through the loop on your thumb with the point of the hook pointing towards the tip of the thumb.  See Fig. C-2.
Fig. C-2

 Rotate the tip of the hook counter-clockwise so the yarn between the thumb and the index finger is caught on the hook (see Fig. C-3).

Fig. C-3

 Carefully pull the tip of the hook back through the thumb loop; slip the thumb from the loop and pull the ends of the yarn until the loop is snugged up just under the hook.  Do not pull the loop too tight, because you will need to insert the hook into it later.  You have just made the first stitch of your chain.


Now, holding the first stitch between the thumb and middle finger of your left hand, catch the yarn on the hook again (Fig. C-4), and draw through the loop on the hook (the old loop will slide off the hook and the new loop will be in its place).
Fig. C-4


Continue catching the yarn and drawing it through the loop on the hook until the chain is the desired length. 

Single Crochet

Now we are ready to start forming the fabric.  We will begin with the single crochet stitch (abbreviated sc).  Pull the chain out so that it stretches away to the left of the loop on the hook.  Insert the tip of the hook into the 2nd chain from the hook (see Fig. SC-1).
Fig. SC-1
 Catch the yarn on the hook, and draw through the chain stitch; there are now 2 loops on the hook (Fig. SC-2).

Fig. SC-2
Catch the yarn again, and draw through both loops on the hook (one single crochet stitch completed).  Insert the hook into the next chain stitch to the left, catch the yarn, draw through the chain, catch the yarn again, and draw through both loops on the hook.  Continue working a single crochet (sc) into each chain across.

Second Row:

Make 1 chain stitch at end of Row 1, then turn the piece of crochet as if it were a page in a book.  Insert the hook under the top two loops of the first single crochet stitch (the one at the right end of your work).  Catch the yarn and draw through the stitch; catch the yarn again and draw through both loops on the hook.  Continue to work one single crochet into the top two loops of each stitch across the row.  The rest of the rows should be worked in the same manner as Row 2.

At the end of the last row of single crochet, cut the yarn about 8 inches from the last stitch.  Pull the hook up so the tail end pops through the top of the last stitch, and pull snugly to secure it and keep your work from unraveling.  This is called ending off or breaking off, and can be done with any stitch.  

Saturday, September 29, 2018

Stitch Swatch Sampler Project: Textured Crochet Stitches


My daughter Gwennie just graduated from college, and now that she has a little more time on her hands, she wants to refresh her knitting and crochet skills.  We came up with this project to help her build her skills, and we would like to invite you to join along as we explore textured crochet stitches.  

I will be posting the instructions for each swatch on my blog, and Gwennie will be making the swatch and posting a photo on Instagram.

This is an opportunity to build your crochet skills, whether you are a relative beginner to crochet or an intermediate crocheter…and even advanced crocheters may learn a few new tricks as we progress from our first block (single crochet) to more advanced textural techniques (clusters, balls, puffs, popcorns, post stitches, and so on).  The idea is to make a 4-inch square block for each stitch, and later join them together to make a useful project.  So find some yarn, pick up your hook, and let’s get started!!
A pile of swatch ideas!

Wednesday, June 6, 2018

The Evolution of a Design

Sometimes it is good to just do something new and different.  I have been focusing on my new knitted Double Garter Stripes technique a lot over the past couple of years, and I recently had a yen to make a crocheted shawl.  I wanted to do something special, but I wasn't quite sure what.  I turned to Pinterest for inspiration.  In a search on Crocheted Shawls, I happened upon a design called the Virus Shawl (quite a name, eh?) that apparently has been going viral (hence the name??) in crochet circles.  What attracted me to the shawl was its graceful shells and the rich interplay of colors I saw in some of the made-up shawls.  I began to dream about a shawl with rich Renaissance or Baroque colors, crisp texture, and flowing pattern.

I decided that a yarn with a slight sheen and long, flowing color segments would work best for this design, something like Lion Brand Landscapes or Red Heart Unforgettable that would have longer color sections but still allow a dramatic color change from one row to the next.

I began to play with some worsted weight yarn from my stash, exploring ideas for working the pattern of the shawl.  I was fairly pleased with the initial results, so I purchased 6 balls of Lion Brand Landscapes in the Rain Forest colorway, and began work on the actual shawl.  As I worked, the pattern began to solidify a bit, and to morph slightly.  My original intent had been to make a roughly crescent-shaped shawl with lacy shells, openwork with tall treble stitches, and picots for richness and texture.  But as I crocheted, I decided to focus more on the shells and picots, and move away from the treble lace.  This allowed the colors to interact more vividly together.  The overall effect caused the outer edge of the shawl to be a little bit ruffled.  I haven't decided if I like the ruffled effect or not...I like the idea of the fullness at the outer edges of the shawl, but I am not quite sure I like the way the finished shawl drapes.  I may need to try it in a thinner, more drapey yarn such as Red Heart Unforgettable.

I ended up buying one more ball of the Landscapes to complete the edging on the shawl.

Here is the finished shawl.  What do you think?


Here are a couple of photos that show the rich texture, color, and pattern of the shawl.


Yes, that is a red ribbon from the county fair.  I was a bit disappointed that it didn't win a blue!  But as I was photographing it, I noticed a 3/4" yarn tail sticking out on the wrong side of the shawl that I had neglected to clip during the finishing process.  Oh, well...you can't win them all.

I haven't completely solidified the design for this shawl yet.  I need to play with it more, to work out the kinks in the pattern and to make the design more cohesive.  But I am very pleased with the initial result.  I need to get more colorful, shiny yarn!

Thursday, December 7, 2017

Miss Ellen's Mount Hood Doorstop


When my friend Ellen heard me describe the Sea Stone Paperweights I've been making from special stones I pick up along the beach, she knew she had to commission me to make one for her.  But the thing was, what she really wanted was a doorstop...something larger that would hold a door open or closed.

Ellen has been collecting special stones for many years now, so she had quite a few to choose from.
She had planned to find one on an upcoming trip, but when that trip became impossible because of some health concerns, she decided to find one from her collection.

She called one day, excited to tell me about the stone she had found.  She said she calls it her "Mt. Hood Doorstop" because it is shaped like a mountain, with a point on the top.  She had certain colors she wanted, to match her decor...white, and gray, and mauve.  She was afraid the sharp edge on the rock might be a problem, and we discussed the possibility of covering the point at the top with crochet, so it wouldn't be too sharp.  There were also some sharp edges on the side and bottom of the piece, as well.

As we brainstormed the doorstop design, I began to get an image in my mind of what this creation could look like.  We both began to get excited as we imagined our creation!  I suggested that I could do the white top at the peak resembling snow, and then do some of the gray in an openwork pattern so the rock could show through.  I asked her if she would mind if I used some forest green along the lower flanks of the mountain, and she suggested that maybe I could use the mauve to represent flowers sprinkled through the forest.  Later she called me back and asked if I could make some white parts that would flow down like glaciers...I had already planned to do that.

I was very excited when her husband dropped by soon after with the rock and some color swatches.

The front face of the rock

The back face of the rock
A couple of the colors I had in my stash of crochet thread, but the others proved to be elusive.  Apparently there is not much call for mauve crochet thread these days!  But I managed to collect the  colors I needed.
The tools and materials for the doorstop

I had asked my husband if we had anything that could smooth the sharp edges on the stone, and he said no.  He suggested emery cloth, but I didn't know where I could get some.  One day, as I was running my finger along the rough edges of the stone, I got an idea.  Would an emery board work?  I had a few around, and tried one.  It smoothed the sharp edges of the stone into a fine dust, without marring the flat surfaces of the rock.  Praise the Lord!  Problem solved.

I was now able to begin crocheting the cover for the rock.  My plan was simple (or so I thought).  I would make the "snowy top" first, then do most of the lacy gray openwork part, then crochet the bottom green and mauve part, and last I would use the gray to connect the top and bottom parts.

I began with the white, making a relatively amorphous cone for the top of the mountain.  I wanted some "glaciers" that would come farther down the mountain than others.

The "snow" for the top of the mountain
When this was completed, I tried it on.  It looked ok.


Next, I worked on the openwork with the gray thread.


At first, I just worked a network around the white edges, but I didn't like the corners that this formed in the white thread.  I ripped it out, and worked a round of sc in gray around all the white edges, then worked the network again.  This looked much better.

Now, I was ready to work the most difficult part of the doorstop...the green bottom part.  This was difficult because the rock was such a complex shape.  I decided to work a flat piece for the bottom that would more or less match the shape of the bottom of the rock.

Comparing the flat bottom to the bottom of the rock
When I had the flat part more or less matching the shape of the rock bottom, I worked a round of crochet all around it and began working upward in rounds.  I had decided to use a shell stitch for the sides of the forest, and intersperse pink bobbles among them for the flowers.  After I had worked several rounds of this, I tried it on the rock.


It was a bit loose...especially at the top, where the rock was rapidly decreasing in size.


I tried the top on, too...just to get an idea of how they would fit together.  I decided I would need to decrease several times on the edge where the stitch marker is, to make it fit better.  I ended up ripping back the gray part, and redoing parts of it, before working the joining round.


 Here is the finished product.  I wish the green part was a little less wonky, but overall I am pleased with the results.  I might just have to look for more mountain-shaped rocks!  I think Miss Ellen will love it.
 The back side of the mountain is not quite so neat and tidy, because of its uneven shape.

Side view
Opposite side view

Looking at the side views shows how wonky the shape really was...this is what made it complicated to fit the crochet to the rock.

Here are a couple more photos of the mountain, because I had so much fun taking them!


When my daughter saw the photos I had taken, she suggested that I do some with blue sky as the background, so it would really look like a mountain.  So here are a couple shots.


P.S.  This doorstop is a Christmas present for Miss Ellen...let's keep the photos to ourselves until Christmas!

Saturday, November 25, 2017

Sisters and Sea Stones

Last May, my siblings and I, along with our spouses, spent about a week at the Oregon Coast.  It was somewhat bittersweet, as one of my sisters has cancer, and we wanted to spend some time with the four siblings together, Just in Case.

We talked about all sorts of things, laughed together (enjoying the humor that our family all seems to share), shared our dreams, hopes and fears, and reveled in just being together and in the beauty of creation and the raw power of the crashing waves.  We talked about our parents, and the things that had shaped us into the people that we have grown up to be.  We probed our differences, and came away with a renewed affirmation of our love and commitment to each other in light of (and in spite of) them.

Retaliation for my taking their photo!

One day, as I was walking on the beach with two of my sisters, we found a few stones that I thought might work for my crocheted Sea Stone Paperweights.  We brought them back to our beach house, and set them on the table for the rest of our stay.  We talked a bit about the paperweights I have been making from stones I pick up on the beach.

After our return, I realized that I had been staying at the beach with three sisters (well, technically two sisters and a sister-in-law), and I had picked up three rocks to use for Sea Stone Paperweights.  It seemed meant to be...I would make a paperweight for each of them, as a memento of our time together.

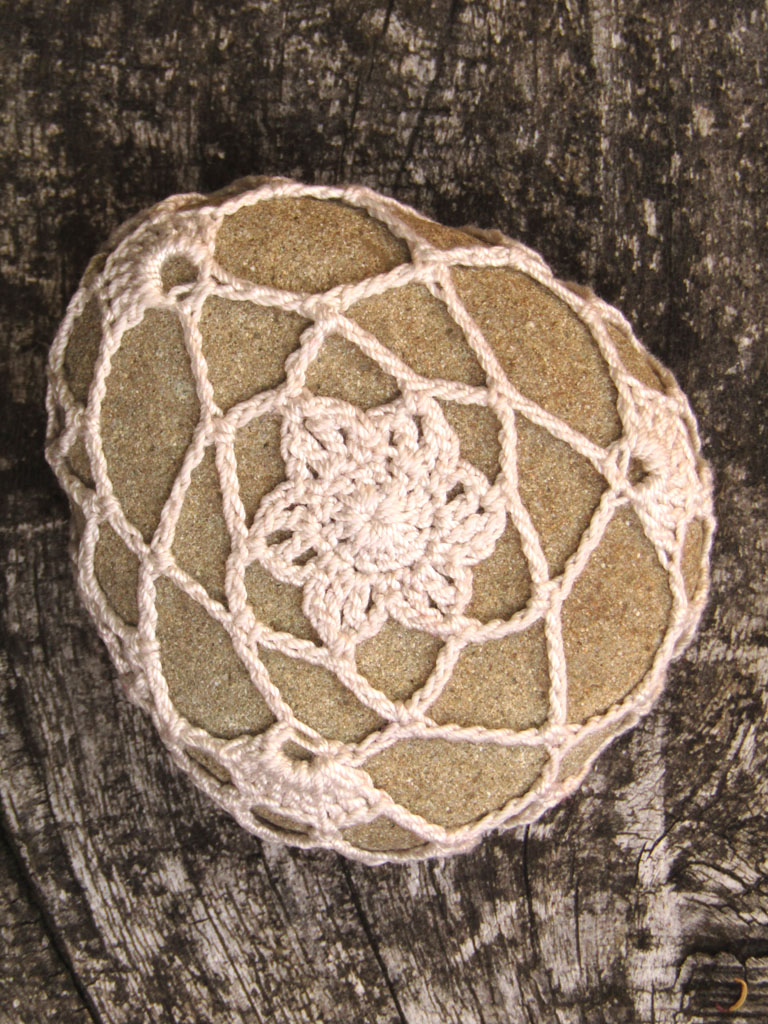
The paperweights are created by crocheting around the stone with a fine crochet thread and a tiny hook.  It can be a bit tricky getting the crochet to fit nicely on the stone.  But I'm finding that making these little gems is a bit like eating potato chips...I keep wanting to make just one more!

Here are the paperweights, each designed with a specific sister in mind.


I suppose I should have made one for my brothers, who were also there...sorry, Ray (and Tim!).  They seemed more like a sisters' thing.

I plan to ship each of these off to a sister over the next couple months.


I hope they like them!

I am getting ready to list some Sea Stone Paperweights in my Etsy shop.  Watch for them!  They would make a wonderful gift for the person who has everything.


Tuesday, July 25, 2017

Meeting a Knitting Hero

A while back, I was looking at some Ravelry forum posts, and came upon a question about garter stripes.  It was pretty late, and I needed to be heading off to bed, but I thought, "I need to reply to this post!" as it was a question about how to make garter stripe fabric look the same on both sides.  This was the technique I had discovered, and it was important to let people know about it.

I wrote a short post about how I had been playing around with this technque, posted a photo of a scarf I had made, showing its reversability, and explained that I had been working on a scarf pattern that I hoped to publish soon.

The photo I posted in the Ravelry forum
I came back later, and there was just one comment to my reply...but it was someone whose name I well recognized, an expert on knitting technique who lives just a couple hours away.  I have been aware of Joan Schrouder for a number of years, running clear back to my days of lurking on the KnitList, an internet knitting community of sorts.  I was very impressed with Joan's posts; they showed a depth of knowledge about knitting that was impressive, but more than that, I sensed that she had a love of learning knitting techniques, and an almost scientific approach to solving problems. When others were getting emotional and defensive about their way being the best, Joan would step in and be the voice of reason.

Anyway, Joan showed a kind interest in the technique I had discovered.  She even suggested that, if I were going to the Black Sheep Gathering in Eugene in June, that she would like to meet with me.  My husband and I have never made it down to the BSG, but it seemed worth trying to get down there to meet Joan...so we made plans to meet her.

Joan was just as friendly and interesting in person as she is online.  I gave her a copy of my newly-published pattern, and showed her how to make a small swatch using the Double Garter Stripes technique.  We had a lively conversation about technique, and I asked her for counsel concerning my pattern.  All in all, it was a great visit, and I feel like I have made a new friend!

Thank you, Joan, for your kind interest in the technique, and for suggesting that we meet.  I'm so glad we did!  I had my husband commemorate the event with a photo.


Tuesday, July 18, 2017

The Joy of Discovery, and the Frustration of Development


Over a year ago, I was playing with yarn and needles.  I like to try different techniques and stitches, and then experiment with different ways of doing things, in the hopes of finding some new, exciting technique.  Little did I know when I started out that day, that I would discover something truly remarkable!

I was playing around with a technique called Stranded Garter Stitch, from Jenny Dowde's Freeform Knitting and Crochet (described on pp. 145-146, and also in a project on pp. 107-110).  After working the stitch according to her instructions, I began trying it with variations.  Using a combination of slipped and knitted stitches, I was knitting happily along, enjoying the beauty of clearly delineated Garter-type stripes.  After working this way for a few rows, I turned the work, and--gasp--realized the the stripes looked the same on both sides!!

I began knitting again, this time making sure I recorded what I had done that had created this effect. The amazing thing was, that the technique was not particularly complex or intricate.  But I had never seen it done before.

I decided to design a scarf using this technique.  But I ran into a knotty problem when I tried to find a way to start and end the technique.  The cool thing about this technique is that it is reversible; yet, try as I might, I could not seem to find a way to begin and end the piece that looked the same (or at least somewhat similar) on both sides and symmetrical from the bottom to the top of the piece.  I must have done 25 or more swatches, trying to find a way to make it work.  I finally came up with something that (sort of) satisfied my requirements, and knitted several scarves as I worked on writing up the pattern.
Some of many swatches

I kept experimenting, though.  There had to be a better way!  In the meantime, I was devising a way to make a matching cap.  I tried short rows, which worked great, but because I wanted the cap to be reversible, too, I needed to graft it together invisibly.  I'm still working on that one!  I did figure out how to do the Double Garter Stripes technique in the round, and am working on a hat pattern now. Here is a sneak preview:

One possible version of the Double Garter Stripes Cap


One day, as I was getting ready to knit yet another Double Garter Stripes Scarf, I decided to try a chain cast on, alternating the colors.  It worked!  And if I did it right, I found that it created an alternating chain on both sides of the fabric.  Best of all, I was able to start right in with the first row of the fabric, and by doing a similar technique for the bind-off, I was able to make a scarf that was more completely reversible than my previous attempts had been.

I've been working on writing up that pattern ever since, and finally got it all put together.  Here is a photo of the completed scarf, showing both sides so you can see how reversible this technique is.


The pattern, Double Garter Stripes Scarf, is available on Ravelry: http://www.ravelry.com/patterns/library/double-garter-stripes-scarf
Etsy: Mountain Mist Fiberworks Double Garter Stripes Scarf
Craftsy:  Double Garter Stripes Scarf on Craftsy

I have lots more ideas for uses for this technique!  It is a rhythmic stitch that is relaxing to work, and it creates a thick, warm fabric with lots of texture and color.  I hope you will give it a try!